
Watching a neighbor scramble after a loss changes how “prepared” feels. Suddenly, it’s not about being organized—it’s about being able to remember what you owned when stress is high and time matters. This guide gives you a quick, realistic method you can do tonight, plus a simple way to store photos and receipts so you can find them later.
The point isn’t to build a perfect spreadsheet. The point is to create findable proof and a usable memory aid—something you can pull up quickly if you ever need it.
Why the Home Inventory for Insurance Matters When You’re Stressed and Time Is Short
If you’ve ever watched someone go through a theft, a kitchen fire, or water damage, you’ve seen the same problem appear fast: they can’t remember details under pressure.
Not because they’re careless—because it’s genuinely hard.
When you’re stressed, you don’t remember the “invisible” things:
- What brand that blender was
- Which laptop model you bought two years ago
- How many tools are in the garage
- The stuff in closets, drawers, and cabinets you don’t think about daily
The contrarian truth: a home inventory isn’t about perfection. It’s about being able to say, “Here’s what we had,” without relying on memory alone.
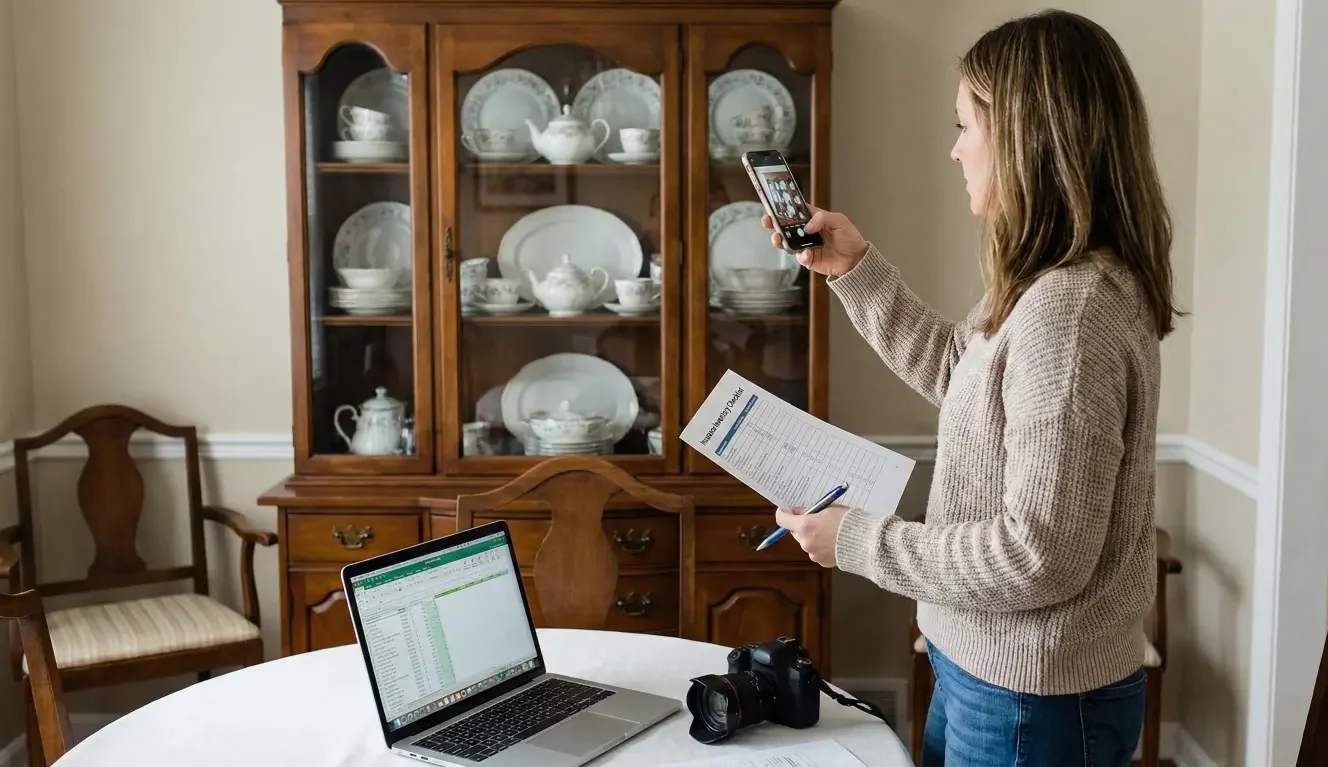
The 30-Minute Method: A Simple Checklist That Works
This is designed to be doable even if you’re busy, tired, and not “in the mood.” Set a timer. Move quickly. You’re building a baseline you can improve later.
Set Up (2 Minutes): Pick a Storage Location + Name the Folder
Pick one storage place you can access from anywhere:
- A cloud drive folder
- A dedicated folder on your phone that syncs automatically
- A shared family folder (if you share a home)
Create one folder named something obvious:
- Home Inventory
Inside it, create 3 subfolders:
- Photos
- Receipts
- Key Docs
Put today’s date in a note inside the folder (or rename a subfolder):
- Photos — 2026-01-19 (or whatever today is)
That’s it. Don’t overthink.
Sprint 1 (10 Minutes): Main Living Areas Photo Sweep
Start where the highest volume of “stuff” is visible:
- Living room
- Dining area
- Office corner
- Entertainment area
What to do:
- Stand in each corner and take a wide shot
- Then take 2–4 close shots of high-value items (TV, computer, camera, gaming console, speakers)
- If you can, capture brand/model quickly (a label on the back, a settings screen, or the box if it’s nearby)
This is not an art project. Slightly messy rooms are fine. The point is documentation.
Sprint 2 (10 Minutes): Kitchen + Appliances + Drawers (High-Value Density)
The kitchen is a “value dense” zone: lots of items, and plenty of them cost more than people realize.
Do this fast:
- Wide shots of countertops and pantry
- Open two or three drawers and take a picture of what’s inside (yes, really)
- Appliances: take one photo of each major item (fridge, stove, microwave, dishwasher), and if the label is easy, grab a quick shot of the model sticker
- If you have specialty items—stand mixer, espresso machine, air fryer, chef knives—give them a close-up.
Sprint 3 (8 Minutes): Closets/Bedrooms + “Expensive Categories” Pass
Closets are where claims get painful, because people forget how much is there.
Fast method:
- One wide shot per closet
- One shot per dresser drawer if it’s packed (open drawer, photo, close drawer, done)
Then do a quick “expensive categories” scan:
- Jewelry (photo the box/collection—don’t list it all tonight)
- Tools (a wide shot of tool wall, bins, or toolbox contents)
- Musical instruments
- Bikes
- Baby gear
- Collections (cards, comics, collectibles, memorabilia)
If you only have time for one thing: take the wide shots. You can add details later.
What to Capture (and What to Skip) So You Don’t Get Stuck
Most people get stuck because they try to do this like an accountant. Don’t.
Capture the Categories That Are Hardest to Recreate From Memory
These tend to matter most because they’re expensive, numerous, or hard to describe later:
- Electronics (TVs, laptops, tablets, cameras)
- Tools (power tools, specialty equipment)
- Jewelry and watches
- Bikes and sports equipment
- Appliances (major + “nice” small appliances)
- Furniture sets
- Kids’ gear (strollers, car seats, tablets, sports gear)
- Collections (cards, comics, collectibles)
Use “Good Enough” Details
If it’s easy, capture:
- Brand
- Model
- Serial number (only if it’s right there—don’t hunt)
If it’s not easy, don’t stall. A clear photo often does the job of jogging your memory later.
What to Skip Tonight
Skip anything that turns a 30-minute method into a weekend project:
- Itemizing every book
- Counting every piece of clothing
- Writing long descriptions
- Pricing everything
You’re creating a baseline inventory that you can build on later.
Photos + Receipts: The Easiest Way to Store Proof Without Chaos
Your inventory isn’t useful if you can’t find it when you need it.
The simplest system is:
- Photos live in one place
- Receipts live in one place
- A backup exists somewhere else
How to Store Receipts (Without Becoming a Filing Cabinet)
Pick one approach you’ll actually use:
- Email method: Create an email label/folder called “Insurance Receipts.” Forward or save receipts there.
- Photo method: Take a photo of the receipt right after purchase and drop it into your Receipts folder.
- Digital download method: For big purchases, save the PDF receipt into your Receipts folder.
Don’t mix three methods. Choose one as your default.
A Naming Convention That Doesn’t Require an App
Use a simple pattern like:
- Room — Item — Date
Examples:
- Kitchen — Espresso Machine — 2025
- Living Room — TV — 2024
- Garage — Tools Wide Shot — 2026-01-19
For sprint photos, keep it even simpler:
- Living Room — Wide — 2026-01-19
- Kitchen — Drawers — 2026-01-19
- Closet — Primary — 2026-01-19
Backups: One Place You Trust + One Backup
At minimum:
- Store it in a cloud location you can access even if your phone is lost
- Make sure it’s not only on one device
A good rule of thumb: if your house and your phone were both unavailable tomorrow, could you still access your inventory?
Home Inventory App vs Spreadsheet vs Photos: Which One Fits You?
There isn’t one “best” tool. There’s the tool you’ll maintain.
Photos-Only (Fastest, Easiest to Maintain)
Best if:
- You want zero friction
- You’ll actually do it tonight
- You don’t want data entry
Tradeoff:
- Less searchable unless you label folders minimally
Spreadsheet (Great for Detail, Higher Friction)
Best if:
- You like structure
- You’re inventory-minded
- You want a clean list by category
Tradeoff:
- Most people abandon it halfway
App (Middle Ground, Depends on Your Habits)
Best if:
- You’re already app-driven
- You want prompts and categories
- You like scanning receipts and attaching photos in one place
Tradeoff:
- You still have to keep up with it
If you’re stuck deciding, choose photos first. A photo-based inventory done tonight is better than a spreadsheet you never finish.
Claims-Readiness Extras That Take 5 Minutes and Pay Off Later
Once your photos are done, there are a few small steps that can reduce stress later.
Build a Tiny “Key Docs” Folder
Add:
- Policy documents you can easily access (or a screenshot of where to find them)
- A photo of your driver’s license (or where it’s stored securely)
- Lease/mortgage contact info (if relevant)
- A simple contact note: who you’d call first after a loss (agent, claims number, landlord)
Keep it general and practical. The goal is fast access.
Capture “Big-Ticket” Items Separately (If Applicable)
If you own items that would be difficult to document later, create a quick separate set of photos:
- Jewelry or watches (group shot + close-ups)
- Collections
- High-end electronics
- Tools or equipment sets
If any category feels sensitive, keep the photos private and stored securely. The goal is readiness, not oversharing.
Common Mistakes (and the Quick Fix for Each)
- Mistake: trying to itemize everything
Quick fix: Wide shots first. Details later. You’re building a baseline. - Mistake: not backing up photos
Quick fix: Use a cloud folder that syncs automatically, and confirm you can access it from another device. - Mistake: storing receipts in only one fragile place
Quick fix: Choose one system (email folder or cloud folder) and stick to it. - Mistake: forgetting outdoor/garage/storage areas
Quick fix: Add one “bonus sweep” photo set: garage wide shot, storage closet, outdoor equipment (grill, mower, bikes). Even one set of wide shots helps.
How Often to Update (Without Turning It Into a Chore)
You don’t need a strict schedule to make this valuable.
A simple, realistic cadence:
- Update after big purchases (TV, laptop, furniture, appliances)
- Update after life changes (move, remodel, new baby, major downsizing)
- Do a 10-minute quarterly refresh if you can: quick wide shots of main rooms and any new items
If quarterly feels like too much, aim for “after big changes.” The goal is consistency, not perfection.
Want a Quick Coverage + Documentation Check?
If you’re motivated to get prepared after seeing a neighbor go through a loss, the best time is now—while it’s fresh. Take 30 minutes to build your inventory, then make sure it’s stored somewhere you can actually find later.
Send us a few photos of how you’re storing your inventory (or your current folder setup), and we’ll suggest a simple way to make it easier to find during a claim.
Request a homeowners or renters quote review to make sure your personal property coverage matches your needs.
FAQ
1) What is a home inventory for insurance?
A home inventory is a record of the belongings in your home—usually with photos, descriptions, and sometimes receipts—so you can remember and document what you owned if you ever need to file a claim after a loss.
2) What’s the easiest way to make a home inventory quickly?
A photo-first, room-by-room sweep is often the fastest method. Start with wide shots of each room, then add close-ups of high-value items. Store everything in one labeled folder so it’s easy to find later.
3) Do photos count as a home inventory for insurance claims?
Photos can be a strong start because they help document what you owned and can jog your memory later. For some items, adding details like brand/model (and receipts when available) can make your inventory more useful.
4) How should I store receipts for insurance?
Pick one simple system you’ll use consistently—such as a dedicated email folder/label or a cloud “Receipts” folder. For paper receipts, a quick photo saved to the folder is often enough to keep things organized.
5) Is a home inventory app better than a spreadsheet?
It depends on what you’ll maintain. Apps can be convenient for attaching photos and receipts in one place. Spreadsheets can be great for detail but are easy to abandon. If you’re unsure, start with photos and add structure later.
6) How often should I update my home inventory?
A practical approach is to update after major purchases or life changes (moving, remodeling). If you want a routine, a quick refresh a few times a year—just updating room photos and big-ticket items—can keep it current.
Request a homeowners or renters quote review to make sure your personal property coverage matches your needs.
RELATED LINKS: