
Water is dripping from your ceiling, and suddenly you’re juggling your neighbor, the HOA, and insurance—while your unit is actively getting worse. The frustrating part is that “who pays” isn’t answered by one sentence like “the upstairs owner is responsible.” It depends on where the water started, what was damaged, what the HOA master policy covers, and what your HO-6 covers—so this guide starts with what to do first, then shows you how to think through responsibility without guessing.
When there’s condo water damage, who pays?
First 15 minutes: stop the source and protect the unit (without making it worse)
When water is coming into your condo, you don’t get bonus points for handling everything alone. Your job in the first minutes is simple: stop the water if possible, protect people and property, and capture enough proof that you’re not trying to reconstruct the event later from memory.
What to do immediately
1) Try to stop the source—fast.
Start with the most direct path:
- Upstairs neighbor answers: Ask them to shut off the water to the fixture or appliance that’s leaking (sink, toilet, washing machine, dishwasher, water heater), and to stop using it until the cause is confirmed.
- No response upstairs: Call your HOA emergency line or building management. If your community has maintenance on-call, this is the moment to use it.
- If you have access to a shared shutoff: Some buildings have common shutoffs for stacks/risers. Only touch these if you know what you’re doing or you’re directed by maintenance/HOA. Otherwise, let building staff handle it.
2) Reduce the spread.
Even before you know “who pays,” you can limit how much gets damaged:
- Put a container under the drip or bulge point.
- Move rugs, electronics, furniture, and anything that can stain or warp.
- If water is pooling near outlets or electronics, keep safety first—don’t step into standing water around electrical cords.
3) Start documenting right away.
Open your phone camera and take:
- A wide shot of the room to show context.
- A mid-range shot showing the ceiling/wall/floor area affected.
- A close-up showing the drip line, stain edge, bubbling paint, or water line.
If water is actively dripping, take a short video as well. It helps show “this was happening now,” not later.
The “don’t do this yet” list
In the heat of the moment, people accidentally create problems that show up later in a claim conversation. Try to avoid these until you’ve documented and gotten basic guidance.
- Don’t rip out drywall or flooring before photos. If something needs to be opened for safety or to stop active water, document first if you can.
- Don’t throw away damaged items. Keep them (or at least photograph thoroughly) until you’re told they’re no longer needed for claim evaluation.
- Don’t sign a major repair contract in panic. It’s normal to need emergency mitigation, but be cautious about committing to full rebuild work before there’s clarity on coverage and scope.
- Don’t accuse your neighbor. Stick to facts (“water started at X time,” “damage is in these areas,” “source appears to be above the kitchen”)—it keeps the situation from escalating and helps insurers do their job.
The fast answer to “who pays” (and why it’s rarely one person)
If you’re searching “condo water damage who pays,” you’re looking for a simple answer because everything feels urgent. Here’s the most useful “fast answer” you can use right now:
“Who pays” is usually decided by three buckets:
- Where the water started (source)
- What was damaged (property category)
- What your HOA documents and insurance policies say (coverage + responsibility)
And here’s the contrarian part that clears up a lot of confusion:
“Who is responsible” and “which policy pays first” can be different questions.
A neighbor might ultimately be considered responsible based on facts, but your own HO-6 policy may still be the fastest way to get the claim moving for your interior finishes or personal property. Then insurers may sort out reimbursement between themselves later. That’s not a promise—just a common reason why people feel like they’re getting mixed messages.
The goal early on isn’t to win an argument about fault. It’s to:
- stop additional damage,
- document clearly,
- notify the right parties,
- and keep your claim options open.
Map the damage: common elements vs your unit vs your stuff
Condo water damage gets complicated because your condo isn’t one property bucket. It’s typically divided into categories that matter for claims.
How condos typically divide property (verify with HOA docs)
Most condo communities have governing documents that define what belongs to the association (common elements), what belongs to the unit owner, and where the line is drawn. The line can vary by community, so treat this as a framework to guide your questions—not a final answer.
Common categories people run into:
- Building/common elements: shared plumbing stacks, structural components, common area ceilings/walls, exterior elements (varies)
- Your unit’s interior finishes: flooring, cabinets, drywall/paint, fixtures (varies)
- Your personal property: furniture, clothing, electronics, rugs, décor, tools, collections
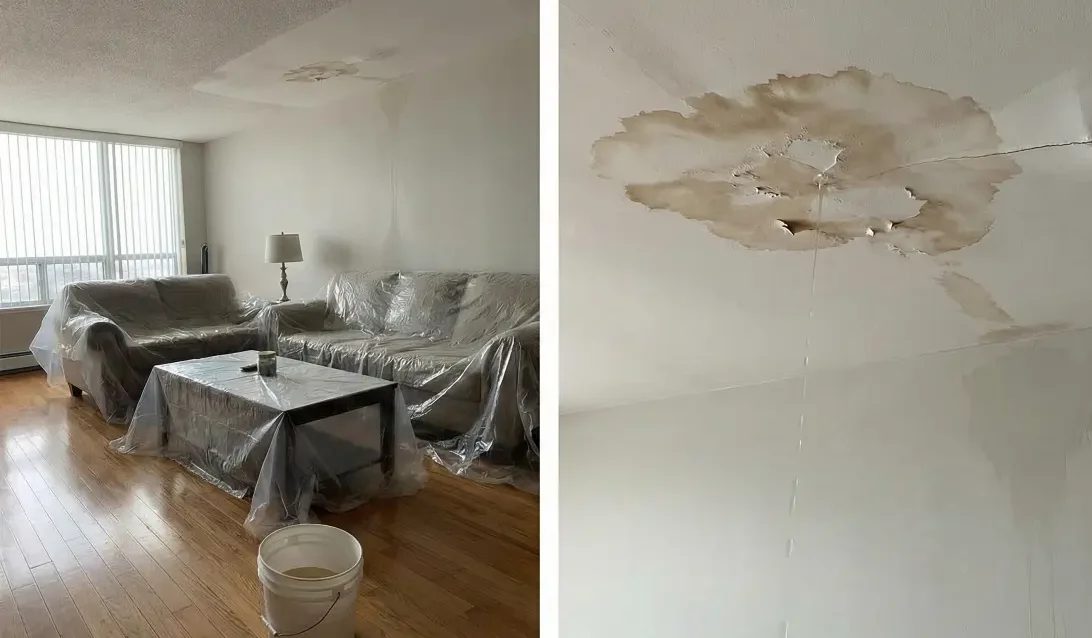
Examples you’ll likely see in an upstairs leak
- Ceiling drywall or paint bubbling in the room below
- Warped flooring (especially laminate/wood)
- Cabinet swelling or damaged toe-kicks (kitchen/bath)
- Light fixtures affected by water (don’t touch—notify maintenance)
- Personal property damage: rugs, couch, TV, computers, bedding, clothing
A quick “write this down” checklist
Start a note on your phone and list:
- Rooms affected: (Living room, kitchen, bedroom, hallway, closet)
- Surfaces hit: ceiling / wall / floor / cabinets
- Contents hit: list anything that got wet (electronics, furniture, clothing, rugs)
- Visible signs: dripping, staining, bulging, pooling, odor, humidity
This becomes your baseline for calls and claims. You can update it as damage reveals itself.
HOA master policy vs HO-6: what each might cover (and what to verify)
The most common pain point in condo water damage is assuming one policy covers everything. In reality, you may be dealing with multiple policies and documents that work together.
HOA master policy: what it often relates to (verify)
The HOA master policy commonly relates to the building and common elements—but the details vary widely. Some master policies cover more of the building’s interior components, while others are more limited. You’ll hear people describe differences like “bare walls” vs “all-in,” but the only safe approach is to confirm what your community’s policy and documents say.
HO-6 policy: what it often relates to (verify)
An HO-6 (condo) policy commonly relates to:
- Your personal property (your belongings)
- Interior finishes and improvements (depending on policy and unit definition)
- Loss of use / additional living expenses if a covered loss makes the unit temporarily unlivable (verify)
- Personal liability (separate topic, but relevant if you cause damage to others)
What to ask for right now
To reduce guesswork, ask the HOA (or property manager) for:
- A master policy summary (or certificate of insurance) and claims contact process
- Guidance on what they consider common vs unit owner responsibility
- Where to find the community’s bylaws/CC&Rs and especially the “unit definition” language (TBD by community)
You’re not asking them to “decide your claim.” You’re asking for the documents and the right contacts so you can act correctly.
If the leak started upstairs: when the neighbor’s insurance may come into play
If the water started in the unit above, it’s natural to think: “This is their fault—so their insurance should pay.” Sometimes it may work that way, but the safe way to think about it is:
The neighbor’s insurance may come into play when there’s a liability issue—often tied to the facts of what happened.
That can involve questions like whether the leak was sudden and accidental, whether it was preventable, whether there was prior notice, and how quickly action was taken once discovered. Those details are exactly why documentation and a clean timeline matter.
What information matters (and why you should capture it)
Try to capture facts, not blame:
- Cause category: overflow, appliance failure, plumbing leak, water heater, toilet supply line, etc.
- Timing: when you noticed, when you contacted them/HOA, when the water was shut off
- History if known: Was there an ongoing slow leak? Had the neighbor been warned before? (Don’t invent—only record what you actually know.)
- Response: did the neighbor act quickly, was there a delay, did HOA respond?
How to coordinate without escalating
A calm approach preserves cooperation and keeps the focus on stopping damage:
- Ask the neighbor for basic facts: “Do you know what caused it? Has the water been shut off? Are you contacting your HOA/insurer?”
- Request their contact info if needed for claims coordination.
- Avoid statements like “You’re responsible” or “Your insurance has to pay.” It turns a solvable problem into a personal fight.
If insurers need to determine responsibility, they will. Your job is to keep documentation strong and get the right parties involved.
The documentation that makes claims smoother (photos, timeline, proof)
If you do one thing well in a condo water damage event, make it documentation. When stress is high, memory gets unreliable, and details get blurry fast—especially if damage spreads or multiple people touch the situation.
What to photograph (wide-to-close)
Use this simple pattern:
- Wide shots of each room affected (show layout and context)
- Mid shots of each damaged area (ceiling stain, warped floor area)
- Close-ups showing texture and detail (bubbles, cracks, wet seams, water lines)
- Contents photos of personal items that got wet (electronics, rugs, furniture, clothing)
- If accessible, source area (e.g., a photo of water dripping near a pipe chase, or a note that the source is upstairs and not accessible)
If you see active dripping or a ceiling bulge, take a short video too.
Build a simple timeline (it matters more than you think)
In your phone notes, write:
- Time discovered: “1/19, 6:40 pm — water dripping in kitchen ceiling”
- Calls/texts: “6:43 pm — texted upstairs neighbor,” “6:50 pm — called HOA emergency line”
- Shutoff time: “7:05 pm — water shut off by maintenance”
- Mitigation steps: “moved rugs,” “set buckets,” “ran fans,” “called plumber” (if applicable)
This timeline becomes your anchor if you have to answer questions later about when it started and what actions were taken.
Receipts and records to keep
Keep receipts for anything you pay for related to:
- emergency mitigation supplies (fans/dehumidifiers you bought),
- temporary repairs (if approved),
- and temporary living needs if you can’t use the unit (hotel, meals beyond normal, laundromat, etc.). What’s reimbursable depends on coverage—so the safe move is to keep receipts and confirm later.
The most common mistakes condo owners make during water damage (and quick fixes)
You’re not the first person to deal with this. The common mistakes are predictable—and fixable.
Mistake 1: Waiting too long to report or mitigate
Why it hurts: water damage can worsen quickly if drying and mitigation are delayed.
Quick fix: notify the right people early (HOA + insurer), and take reasonable steps to stop further damage.
Mistake 2: Only documenting the ceiling, not the full impact
Why it hurts: damage often spreads—into floors, cabinets, closets, and personal property.
Quick fix: do a room-by-room sweep and photograph wide/mid/close, plus contents.
Mistake 3: Assuming the HOA covers everything (or assuming the neighbor pays everything)
Why it hurts: you lose time while parties point at each other.
Quick fix: treat it as a multi-bucket situation: master policy, HO-6, and possibly neighbor liability—then verify with documents.
Mistake 4: Starting repairs before adjuster guidance
Why it hurts: you may lose proof of the extent of damage or pay for work that needs to be evaluated first.
Quick fix: document thoroughly, get claim numbers and written guidance, then proceed in an organized way.
A clean next-steps plan for the next 48 hours
Once the immediate crisis is under control, you want a plan that keeps things moving without creating avoidable issues.
Step-by-step sequence
1) Confirm the source is truly stopped.
If the leak restarts or continues, escalate back to HOA/building maintenance. Repeated water events can compound damage.
2) Notify the HOA and ask for their claims process.
Request the master policy contact path and any instructions for documenting building/common element damage.
3) Notify your insurer (HO-6) and get a claim number if appropriate.
Even if you think another party may be responsible, your HO-6 may be relevant for personal property and interior finishes depending on your policy and documents (verify).
4) Start mitigation and drying.
Follow guidance from the HOA/building, your insurer, or a reputable restoration professional if needed. Keep notes and receipts.
5) Get contractor estimates only after you have the right guidance.
If you need quotes, keep them organized and take “before” photos first.
6) Keep damaged items until advised.
Don’t toss everything immediately. If items must be removed for health/safety, photograph thoroughly first and store what you can.
What “confirmation” looks like (proof posture)
You want a simple paper trail:
- claim numbers (HOA and/or insurer),
- emails or written notes about what to do next,
- and written confirmation of any instructions that affect repairs or mitigation.
If you only get verbal instructions, write them down immediately in your timeline notes.
When to escalate (keep general)
Escalate if:
- the leak repeats,
- the HOA isn’t responding and the building systems are involved,
- damage is worsening (new areas showing staining/bulging),
- or you’re being told “not our problem” without being given documents or a process.
The goal isn’t conflict—it’s making sure you’re not stuck while damage continues.
Get a quick HO-6 + documentation review
When water damage involves another unit, the fastest relief usually comes from clarity: what to ask for, what to document, and how your HO-6 fits into the situation.
Send photos of the leak damage and we’ll help you map the HOA vs HO-6 path and what to document next.
Request a condo (HO-6) quote review to make sure your coverage fits condo-specific risks.
FAQ content
- Who pays for water damage in a condo when it comes from upstairs?
It depends on where the water started, what was damaged, and what your condo’s governing documents and insurance policies say. In many cases, more than one policy may be involved (HOA master policy, your HO-6, and possibly the upstairs unit owner’s liability coverage). Start by stopping the source, documenting the damage, and notifying the HOA and your insurer so the coverage path can be confirmed. - Does the HOA master policy cover water damage inside my unit?
Sometimes it may, but it varies by community and by the master policy. The key is the condo’s “unit definition” and what the master policy insures. Ask your HOA or property manager for the master policy summary and where to find the governing documents so you can verify what’s considered common elements versus unit-owner responsibility. - What does HO-6 insurance cover for condo water damage?
An HO-6 policy commonly relates to your personal property and may also cover certain interior finishes or improvements, depending on the policy and how your condo defines the unit. It may also include loss-of-use coverage in certain situations. Because the split varies, the best step is to confirm what your HO-6 covers and how it coordinates with the HOA master policy. - Should I file a claim on my policy or the upstairs neighbor’s policy?
In many situations, it’s smart to report the incident to your HOA and your insurer so you can get guidance quickly—especially if your belongings or interior finishes are damaged. If the upstairs unit owner’s actions are a factor, their liability coverage may be part of the conversation, but responsibility can depend on the facts. Document thoroughly and let insurers determine the proper path. - What should I document for a condo water damage claim?
Take wide-to-close photos of each affected room, close-ups of damage (stains, bubbling paint, warped flooring), and photos of personal property that got wet. Create a simple timeline (when you discovered the leak, who you called, when water was shut off, what mitigation steps you took). Keep receipts for mitigation supplies and any temporary expenses, then confirm what’s needed with your insurer. - What if the HOA and my neighbor both say it’s not their responsibility?
Don’t rely on verbal conclusions. Ask for the HOA’s master policy summary and the governing document language that defines responsibility (“unit definition”). Report the incident to your insurer as well and provide your documentation. In many cases, clarity comes from the documents and the facts of the incident—not from someone’s first reaction in a stressful moment.
Send photos of the leak damage and we’ll help you map the HOA vs HO-6 path and what to document next.
Request a condo (HO-6) quote review to make sure your coverage fits condo-specific risks.